Choose the drawing versions
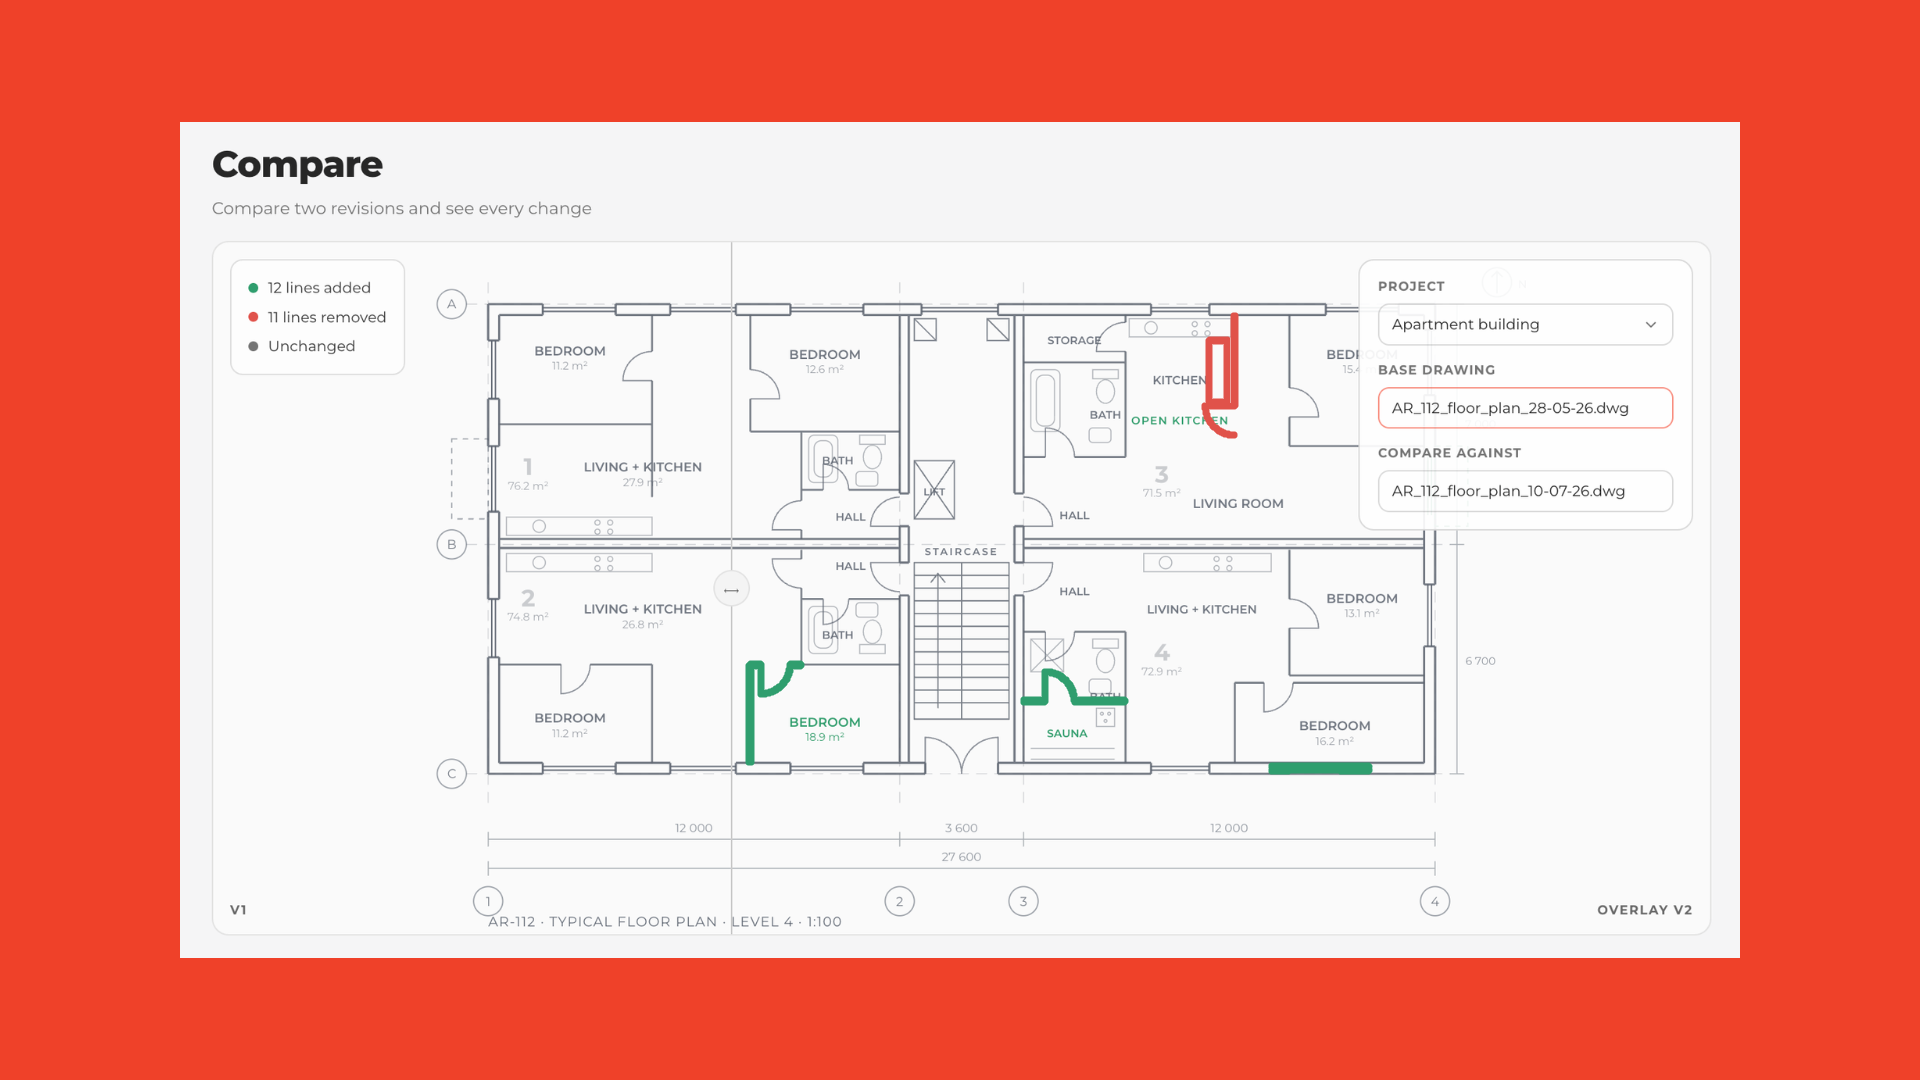
Open the drawing comparison and select two versions of the same file.

Measure between drawing lines
Use the measurement tool to see distances directly on the drawing.

Inspect the highlighted areas
Review the identified differences and check where the geometry or markings changed. Highlighted areas show the differences Franklin has detected and may not represent every change between the two versions.
Verify against the source
Open the source drawing to verify relevant changes in their full context before recording a conclusion or acting on the comparison.
Before you act, confirm that both files belong to the same drawing series and that the newer version is the one your project currently treats as valid.
Turn a difference into an issue
When a change needs action, create the issue directly on the drawing instead of describing the location in words.
Click "Create issue", then click the spot on the drawing where the issue belongs. Franklin pins the issue to that location and links it to the drawing file, so anyone opening the issue later sees exactly where it sits.
The issue carries its own status, assignee, dependencies, dates and tags, and it appears in the project's issue list alongside everything else – ready to be turned into meeting minutes or followed up from the same place.